前言
在开发软件中,一个值得注意的问题就是当程序从一个环境迁移到另一个环境时,我们的程序是否依然正常运行,因为在开发阶段时,某些环境配置可能与生产环境不同,例如数据库配置,加密算法等。
在 Spring 中,你可以分别为不同的环境设置一个配置类,然后在运行时再根据环境来确定应该创建哪个 bean 和 不创建哪个 bean。在 Spring3.1 中,引入了 bean profile 的概念,可以将它理解为我们在Spring容器中所定义的Bean的逻辑组名称,对应到环境一般就是 dev(开发环境),uat(用户测试环境), prod(生产环境),在部署时指定激活哪个 profile 就行了。
在 SpringBoot 中,可以通过创建 application-{profile}.properties, 然后在application.properties 中来指定激活的 profile, 比如指定active profile 为 prod 后,spring就会加载 application-prod.properties。
1
| spring.profiles.active=prod
|
但这样如果每次更换环境时都要更改配置,就比较麻烦,所以可以利用 maven profiles 在构建应用时指定用什么 pofile,springboot 再将这个值替换就行了。
下面利用 server 端口来做一个例子, 分别为每个环境设置一个对应的端口。
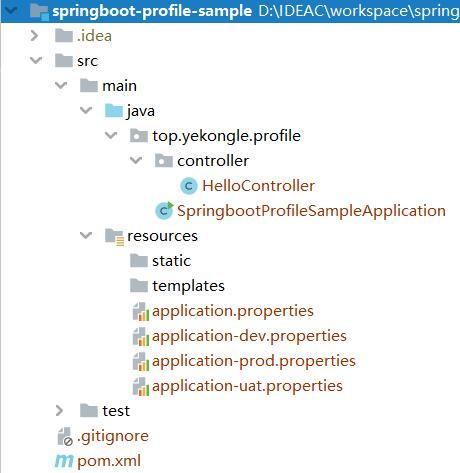
创建项目
项目结构图如下:
![]()
pom 依赖如下:
1
2
3
4
5
6
7
8
9
10
11
12
13
14
15
16
17
18
19
20
21
22
23
24
25
26
27
28
29
30
31
32
33
34
35
36
37
38
39
40
41
42
43
44
45
46
47
48
49
50
51
52
53
54
55
56
57
58
59
60
61
62
63
64
65
66
67
68
69
70
71
72
73
74
75
76
77
78
79
80
81
82
83
84
85
86
87
88
89
90
91
92
93
94
95
96
97
98
99
| <?xml version="1.0" encoding="UTF-8"?>
<project xmlns="http://maven.apache.org/POM/4.0.0" xmlns:xsi="http://www.w3.org/2001/XMLSchema-instance"
xsi:schemaLocation="http://maven.apache.org/POM/4.0.0 https://maven.apache.org/xsd/maven-4.0.0.xsd">
<modelVersion>4.0.0</modelVersion>
<parent>
<groupId>org.springframework.boot</groupId>
<artifactId>spring-boot-starter-parent</artifactId>
<version>2.2.5.RELEASE</version>
<relativePath/>
</parent>
<groupId>top.yekongle</groupId>
<artifactId>springboot-profile-sample</artifactId>
<version>0.0.1-SNAPSHOT</version>
<name>springboot-profile-sample</name>
<description>Profile sample for Spring Boot</description>
<properties>
<java.version>1.8</java.version>
</properties>
<dependencies>
<dependency>
<groupId>org.springframework.boot</groupId>
<artifactId>spring-boot-starter-web</artifactId>
</dependency>
<dependency>
<groupId>org.springframework.boot</groupId>
<artifactId>spring-boot-devtools</artifactId>
<scope>runtime</scope>
<optional>true</optional>
</dependency>
<dependency>
<groupId>org.projectlombok</groupId>
<artifactId>lombok</artifactId>
<optional>true</optional>
</dependency>
<dependency>
<groupId>org.springframework.boot</groupId>
<artifactId>spring-boot-starter-test</artifactId>
<scope>test</scope>
<exclusions>
<exclusion>
<groupId>org.junit.vintage</groupId>
<artifactId>junit-vintage-engine</artifactId>
</exclusion>
</exclusions>
</dependency>
</dependencies>
<profiles>
<profile>
<id>dev</id>
<activation>
<activeByDefault>true</activeByDefault>
</activation>
<properties>
<active.profile>dev</active.profile>
</properties>
</profile>
<profile>
<id>uat</id>
<properties>
<active.profile>uat</active.profile>
</properties>
</profile>
<profile>
<id>prod</id>
<properties>
<active.profile>prod</active.profile>
</properties>
</profile>
</profiles>
<build>
<finalName>${project.artifactId}</finalName>
<resources>
<resource>
<directory>src/main/resources</directory>
<filtering>true</filtering>
<includes>
<include>application.properties</include>
<include>application-${active.profile}.properties</include>
</includes>
</resource>
</resources>
<plugins>
<plugin>
<groupId>org.springframework.boot</groupId>
<artifactId>spring-boot-maven-plugin</artifactId>
</plugin>
</plugins>
</build>
</project>
|
代码编写
编辑 application.properties
1
2
|
spring.profiles.active=@active.profile@
|
创建 application-dev.properties
创建 application-uat.properties
创建 application-prod.properties
创建 HelloController.java
1
2
3
4
5
6
7
8
9
10
| @RestController
public class HelloController {
@RequestMapping("/")
public String index() {
return "Hello world!";
}
}
|
运行测试
打开 IDEA 命令行, 分别输入如下命令
1
2
3
4
5
6
7
8
|
mvn clean spring-boot:run -P dev
mvn clean spring-boot:run -P uat
mvn clean spring-boot:run -P prod
|
打开浏览器
访问 http://localhost:8080
![]()
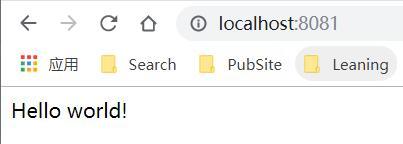
访问 http://localhost:8081
![]()
访问 http://localhost
![]()
可见为不同环境配置的端口访问成功。
项目已上传至 Github: https://github.com/yekongle/springboot-code-samples/tree/master/springboot-profile-sample , 希望对小伙伴们有帮助哦。